
 Google Scholar
 Researchgate
Triskele Globe
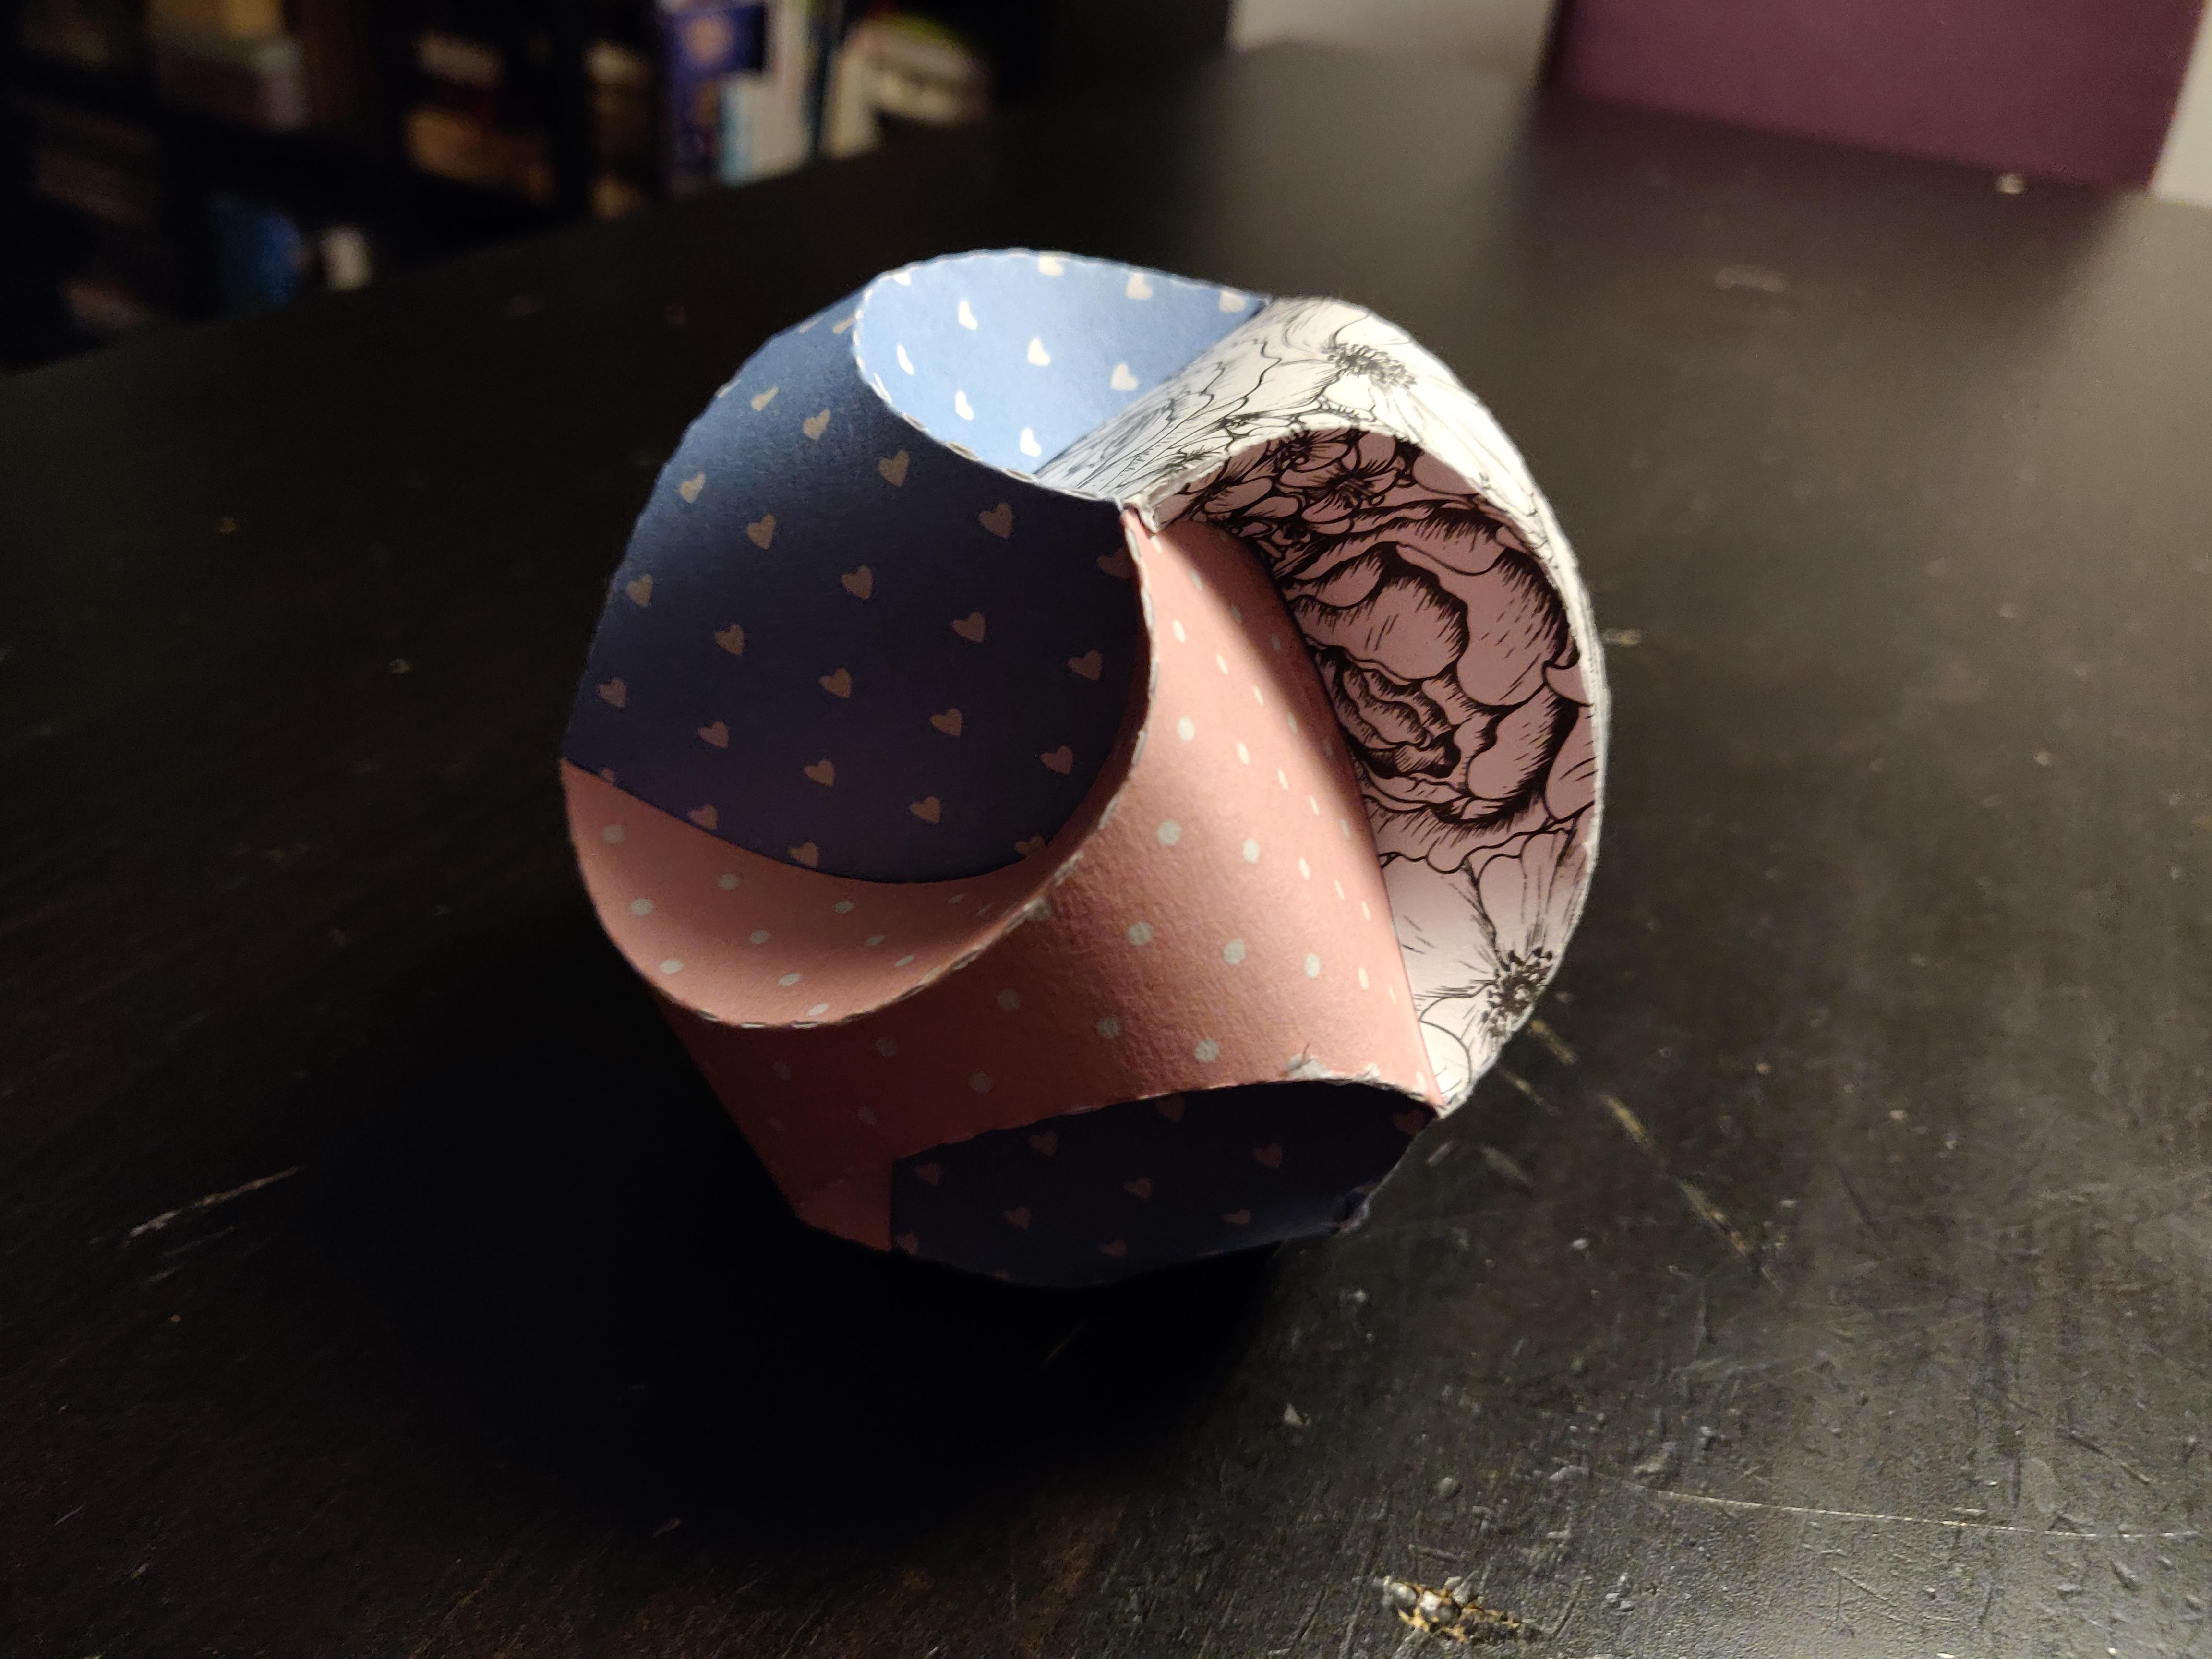
It’s often astounding what elegant things you can make from paper with comparably low effort and simple, yet highly customizable design. Triskele globes are such things. Don’t know about the original creator, but I found them first on hattifant.com. From moment one I saw them, I knew I had to make one. When I made one, I knew I wanted to make more. In this post, I’ll describe how I made them and provide ready-to-use cutting templates. On top of that - and that is the specialty of this post - I provide cutting templates immediately usable with the Silhouette Portrait desktop cutting machine to automate production. You might say: “Fuck, why didn’t you just use a plain paper cutter and your hands?” I’m a nerd, I command machinery.
Requirements
Material
- Design paper
- Glue or sticky tape
- Silhouette Portrait-compatible carrier sheet
Tools
- Silhouette Portrait
- Silhouette Studio
- inkscape (optional for further customization)
Production
Cutting Template
Each triskele globe is actually made from three identical, very simple parts. Below, I provide cutting templates for these parts for different scenarios.
The complete template allows for quick production of all three parts from the same paper in one production step, ready to use with a Silhouette cutting machine. The single-part template should be applied to produce each of the three parts from different papers in multiple steps, again ready to use with a Silhouette cutting machine.
If you intend to further customize your triskele globe, e.g. with more sophisticated cutting patterns, feel free to use the following SVG files. I recommend the wonderful FOSS SVG editor inkscape. Simply add more cut lines, save as .dxf file, open .dxf file in Silhouette studio, configure cut, save as .studio3 file.
Assembly
Once you produced all three parts and pre-scored all folds, you can start assembling your triskele globe. The original instruction video from hattifant.com explains the assembly very well. Sticky tape is sufficient for triskele globes made from thin paper. For triskele globes made from cardboard, I rather recommend to use glue instead.
Tadaaaa! Done.
